Admin settings for your workflow templates
Go to the Admin site by clicking the Admin link in the Backshop footer.

Click the Maintain Codes tab.

The resulting page has a mega list of links.
To create settings for the five types of workflow items, click these links:
- Approval Matrix (for Approvals)
- Notification Matrix (for Notifications)
- Deliverable – Event Type (for Tasks)
- Flowchart Decision Type (for Decisions)
- Workflow Question Type (for Questions)
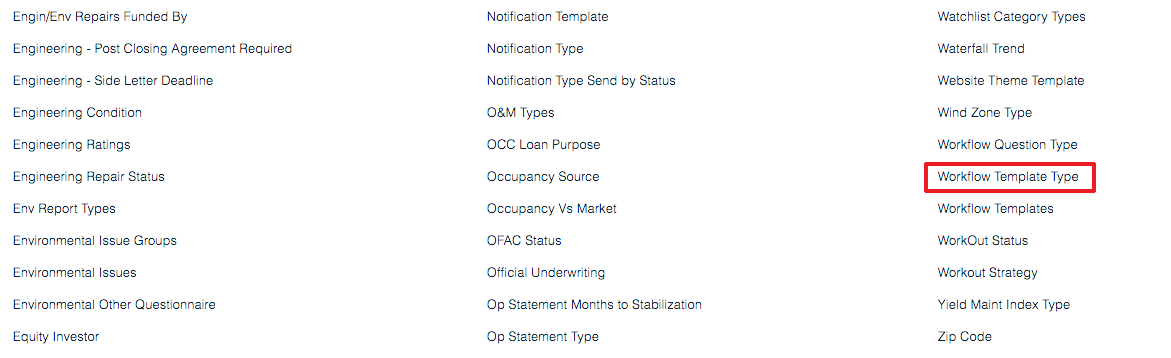
After the settings are created for the five types of workflow items, go back to the Maintain Codes page and click the Workflow Template Type link.
Now you’ll create a container for your template. To create a new one, click the Add New button on the right side of the page.

In the popup window,
- Enter the name of the Workflow Template Type.
- Enter a description for this type of workflow template.
- Enter an order key. This determines where this type lives in the list of workflow template types.
- If you want this to be a “semi ad hoc” template, check the Ad Hoc Sw checkbox. This allows you to use the reminders and calendar. This setting is a good idea if you know you’ll be modifying this workflow — for example adding new ad hoc items.
- If you want to copy items from another template, use the Copy Template Items From menu.
- When you’re ready, click the Add New Type button.

This will return you to the Workflow Template Types page.
To edit a pre-set (non ad hoc) template, click its name.

This brings up an edit interface. At the top of the page is a row of filters:
- Show Active Only (yes or no)
- Workflow Template Type (menu)
- Deal Phase (menu)
- Loan Status (menu)

If you want to change an item, click its template item number on the left side of the page.

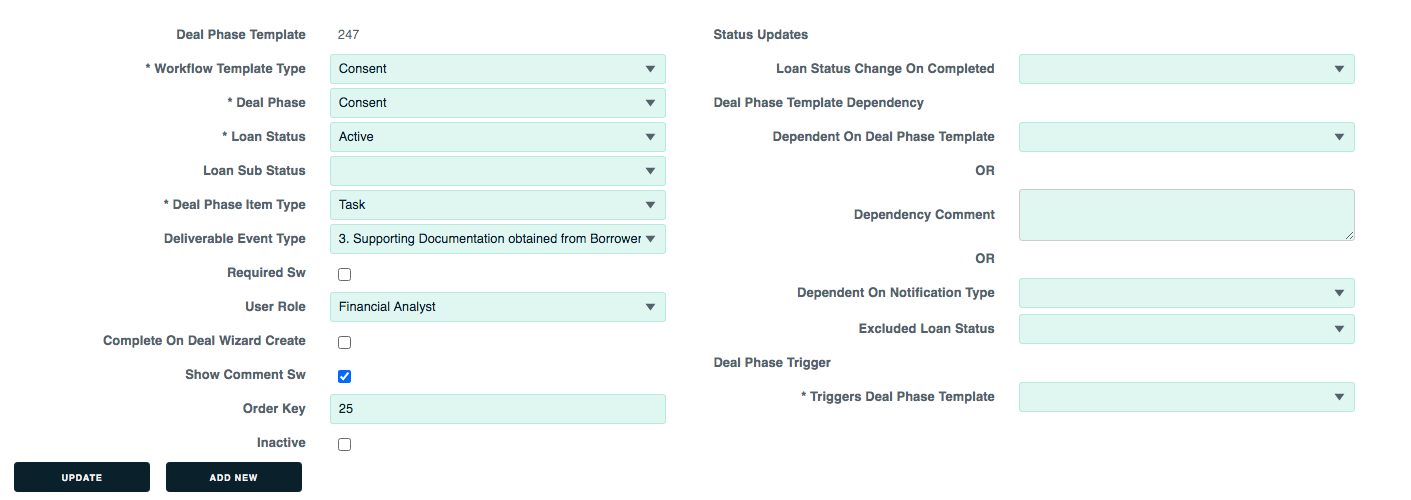
This opens an edit interface at the bottom of the page. This interface exposes all the details, which are editable via menus and checkboxes. There’s also a cool Status Updates section on the right side, but very few people mess with it.
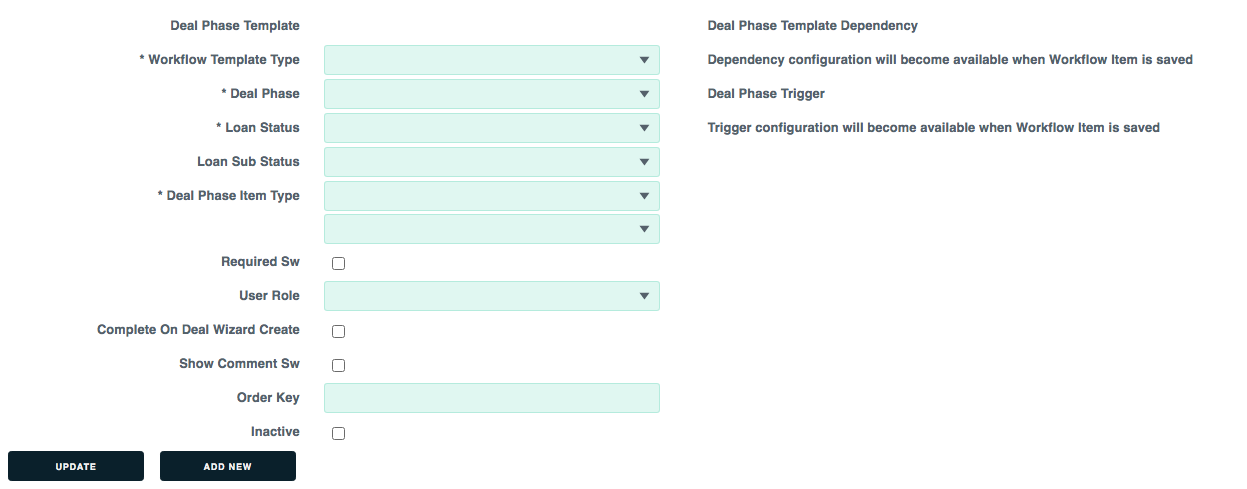
To add a new template item, click the Add New button at the bottom of the page.
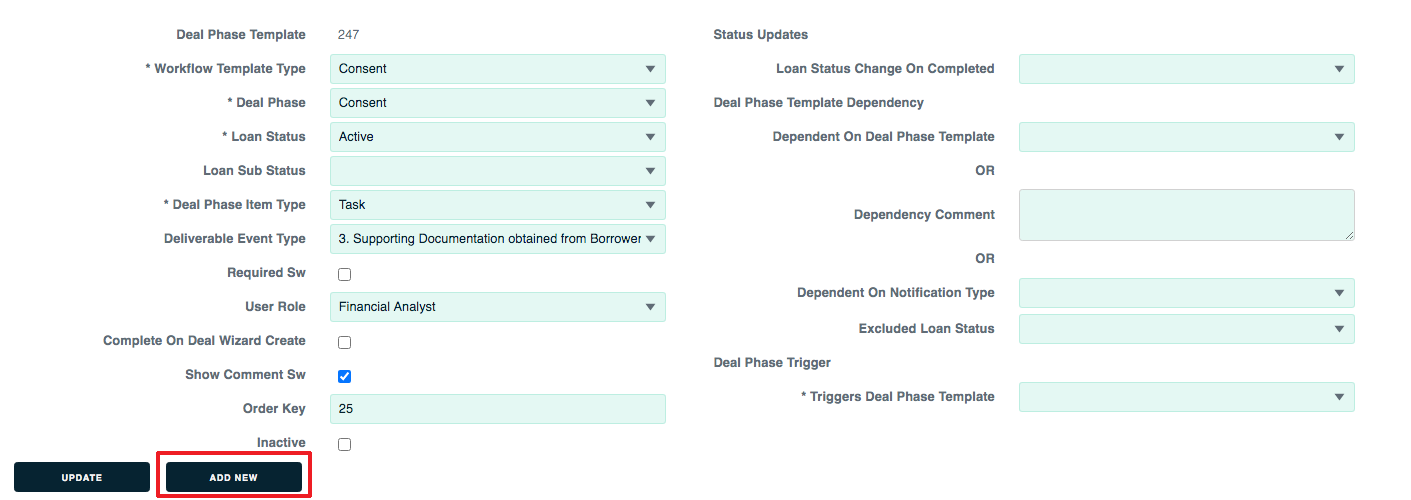
This brings up a blank input interface at the bottom of the page. Enter you info then click Update to save your changes.
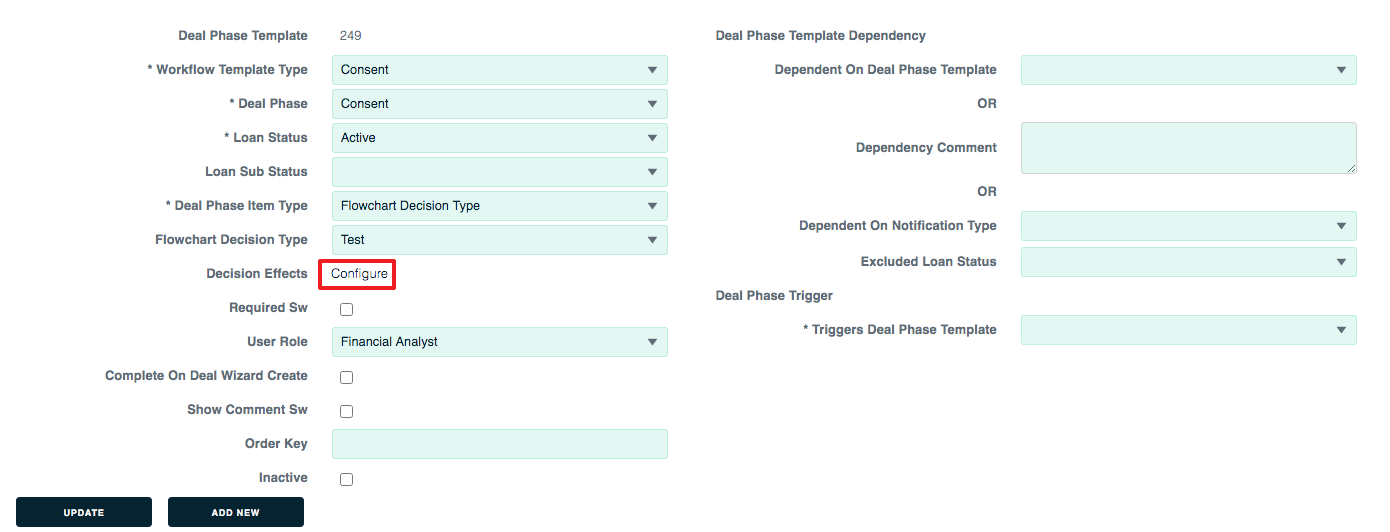
If you added a Decision (it’s called Flowchart Decision Type) be sure to click the Update button to save your changes. After that, you need to click its template item number on the left side of the page.

This opens the edit interface at the bottom of the page. Inside that interface, click the Decision Effects: Configure link.
This brings up a kick-ass popup window that shows the effects this decision has on the steps after it.
- If you click the Set N/A If Yes checkbox, that step will set to N/A if the decision = yes.
- If you click the Set N/A If No checkbox, that step will set to N/A if the decision = no.
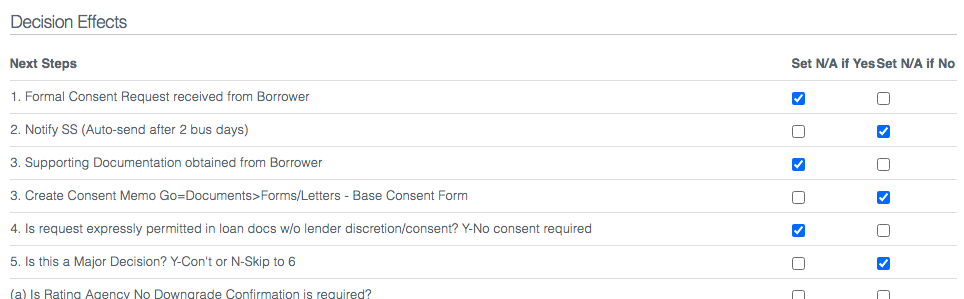
It’s really very cool.
To edit an ad hoc or semi ad hoc template, click its name.

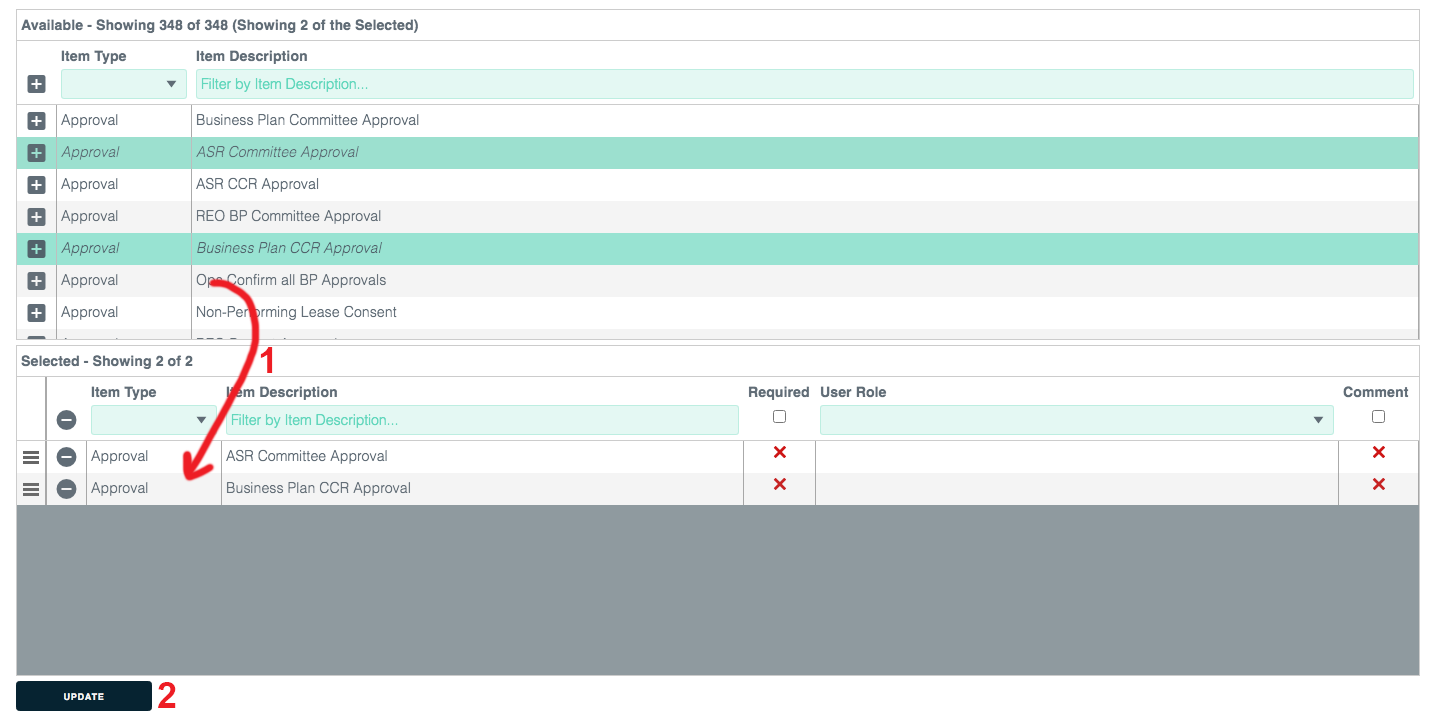
This brings up the workflow template editing page.
1. Drag/drop items from the Available module down to the Selected module, then enter settings in the item’s row.
2. Click Update to save your changes.