
Add a new workflow
Backshop supports multiple workflows.
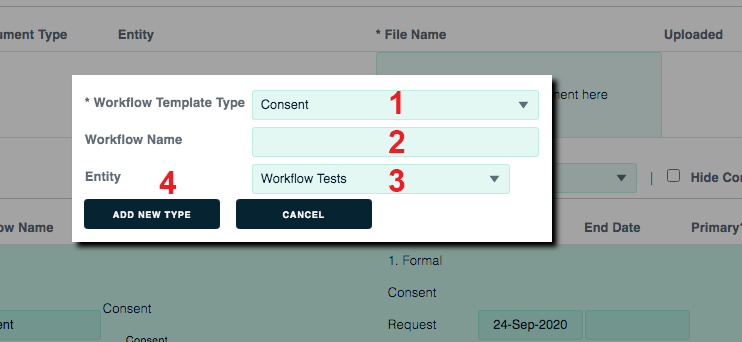
To add a workflow, click the Add New button.

1. Select the template type.
2. Give the workflow a name.
3. Select which entity (note, property, exit plan aka tranche or borrower) this workflow applies to.
4. Click the Add New Type button.
That’s it!
Add an ad hoc workflow
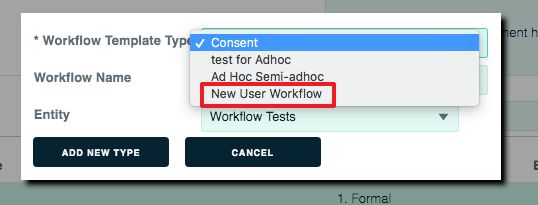
To create an ad hoc workflow, click the Add New button.
In the popup window for type, choose New User Workflow. Give the ad hoc workflow a name. Assign whichever entity you want. Click Add New Type.
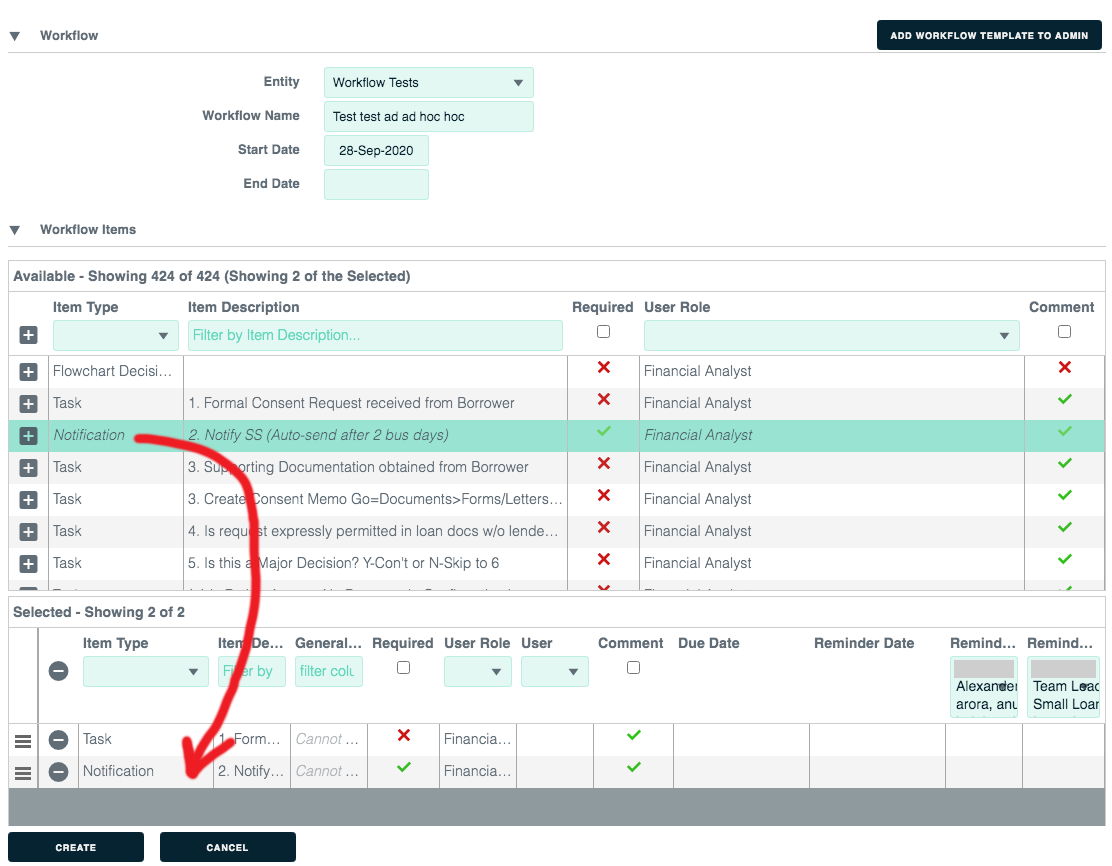
This brings up the Create An Ad Hoc Workflow page.
At the top of the page (in the Available module) is a list of all existing workflow items.
To add items to your ad hoc workflow, drag/drop them from the Available module to the Selected module below. Once an item is in Selected, you can edit whether it’s required, add a user, set a due date, set a reminder date and select users or distribution lists to receive the reminder. Pretty cool.
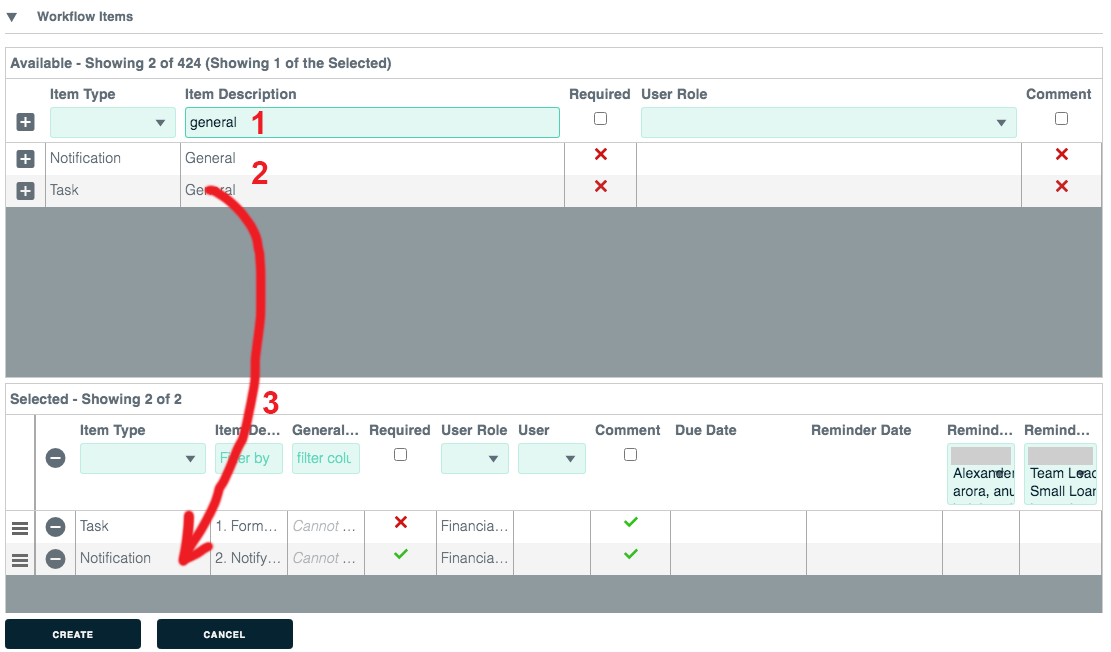
To create a new and unique ad hoc item, go to the top of the Available module.
1. Under description, enter “general.”
2. “General” items will appear in the Available list.
3. Grab one. Drag/drop it to the Selected module. Give it a general description. Indicate whether it’s required. Select a user role. Select a user. Indicate whether you want a comment field. Select a due date. Select a reminder date. Choose users or distribution lists to receive the reminder.
Because this is an ad hoc workflow with no preset condition, there is no Reset option. To reset or change elements, do that within this interface.